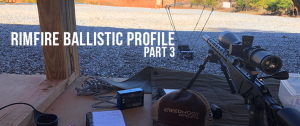
Part 3: The Process- with Wayne Dayberry
We’ve covered the “Quick Start” and “Filling in the Data Gaps” in previous emails. Now we finish this series with an overview of “The Process” and “Truing Your Ballistic Coefficient” for Rimfire Ammunition below.
The Process
1. We need an estimated ballistic coefficient as a starting point to enter in your ballistic solver.
a. For 40grain 22lr rimfire ammunition, I start with a .1 G1 ballistic coefficient as a baseline.
2. Enter the data into your ballistic solver (free ones work just fine for this)
3. If you have the capability, update the environmentals in your solver for the day
4. 100yards: Using your solver, dial the indicated elevation adjustment and confirm with live fire. Write down your elevation adjustment
5. 200yards: same drill. Using your solver, dial the indicated elevation adjustment and confirm with live fire. Write down your elevation adjustment
6. Before going to 300yards: compare what your solver is telling you and what your actual elevation adjustment needed. If they are fairly close, proceed to 300y. If not, skip to the truing section, the come back to step 7 300yards.
7. 300yard: using your solver, dial the elevation solution, make a wind call, and send rounds down range.
a. If not shooting on paper:
i. A good follow through and staying on scope will help you spot misses and make adjustments
ii. A friend on a spotting scope or another rifle optic works very well for this process.
iii. **shooting at easily identifiable spots on the berm (clumps of dirt, clay pigeons etc) helps to call your shots
8. Write down your actual elevation adjustment.
Truing your Ballistic Coefficient
Now the magic happens with a little trial and error.
Before starting this last step, ensure you have the velocity data we gathered earlier. If needed, obtain a good average velocity by shooting 10 shots over a chronograph. Then, for this last step we’ll hold that data constant along with bullet weight and adjust our ballistic coefficient as follows. Go back to your solver and adjust the ballistic coefficient for this ammunition until you develop a profile that is very close to your actual elevation adjustments.
I keep my zero range zero elevation and adjust the ballistic coefficient until my 300 yard is spot on. Then I refine the ballistic coefficient plus or minus very small increments until the intermediate ranges true up as well. Sometimes it is hard to get every range perfect, and that’s acceptable. This is a field expedient method to do what sophisticated radar systems and extensive testing are designed for. In my experience, the ballistic profile is within .1 or .2 mils at all distances from my zero range out to 300 yards. And that’s basically a maximum error at distance of 2”…I’ll take that with a rimfire any day.